
This page demonstrates the process of importing data from CSV file(s) into a graph in Ultipa.

The following steps are demonstrated using PowerShell (Windows).
Usage Guides
Prepare CSV Files
Click to download the example CSV files:
You can place all the files in the same folder as ultipa-importer.
Generate the Configuration File
Open the terminal program and navigate to the folder containing ultipa-importer. Then, run the following command and select csv to generate a sample configuration file for CSV:
./ultipa-importer --sample

A file named import.sample.csv.yml will be generated in the same directory as ultipa-importer. If the file already exists, it will be overwritten.
Modify the Configuration File
Customize the import.sample.csv.yml configuration file based on your specific requirements. It includes the following sections:
mode: Set tocsv.server: Provide your Ultipa server details and specify the target graph (new or existing) for data import.sftp: Configure the SFTP server where your CSV files are stored. If the files are on your local machine, remove this section or leave it blank.nodeConfig: Define node schemas, where each schema corresponds to a CSV file. Columns in the file are mapped to node properties.edgeConfig: Define edge schemas, where each schema corresponds to a CSV file. Columns in the file are mapped to edge properties.settings: Set global import preferences and parameters.
# Mode options: csv/json/jsonl/rdf/graphml/bigQuery/sql/kafka/neo4j/salesforce
mode: csv

# Ultipa server configurations
server:
  # Host IP/URI and port; if it's a cluster, separate multiple hosts with commas
  host: "10.11.22.33:1234"
  username: "admin"
  password: "admin12345"
  # The new or existing graph for data import
  graphset: "myGraph"
  # If the above graph is new, specify the shards where the graph will be stored
  shards: "1,2,3"
  # If the above graph is new, specify the partition function (Crc32/Crc64WE/Crc64XZ/CityHash64) used for sharding
  partitionBy: "Crc32"
  # Path of the certificate file for TLS encryption
  crt: ""

# SFTP server configurations
# If the files are on your local machine, remove this section or leave it blank
sftp:
  # Host IP/URI and port
  host:
  username:
  password:
  # SSH Key path for SFTP (if set, password will not be used)
  key:

# Node configurations
nodeConfig:
  # Specify a schema
  - schema: "Customer"
    # The file path on local machine or SFTP
    file: "./customer.csv"
    # Whether the file includes a header row
    head: true
    # properties: Map columns in file to properties; if unset, all columns will be automatically mapped
    ## name: A column name in the file; if the file lacks a header, this name will be assigned as the property name
    ## new_name: The property name; it defaults to the name above; if the type is _id/_from/_to, the property name is automatically set to _id/_from/_to
    ## type: The property value type; set to _id, _from, _to, or other supported value types like int64, float, string, etc; set to _ignore to skip importing the column
    ## prefix: Add a prefix to the values of a property; only apply to _id, _from, and _to; if a prefix is added to an _id, the same prefix must be applied to the corresponding _from and _to
    properties:
      - name: cust_no
        type: _id
        prefix:
      - name: name
        new_name:
        type: string
      - name: level
        new_name:
        type: int32
  - schema: "Merchant"
    file: "./merchant.csv"
    head: true
    properties:
      - name: merch_no
        type: _id
        prefix:
      - name: name
        new_name:
        type: string
      - name: type
        new_name:
        type: string

# Edge configurations
edgeConfig:
  - schema: "Transfers"
    file: "./transaction.csv"
    head: true
    # _from and _to types are necessary for edges
    properties:
      - name: trans_no
        new_name:
        type: string
      - name: cust_no
        type: _from
        prefix:
      - name: merch_no
        type: _to
        prefix:
      - name: time
        new_name:
        type: datetime

# Global settings
settings:
  # Delimiter used in the CSV files
  separator: ","
  # Path of the log file
  logPath: "./logs"
  # Number of rows included in each insertion batch
  batchSize: 10000
  # Import mode: insert/overwrite/upsert
  importMode: insert
  # Stop the importing process when error occurs
  stopWhenError: false
  # When importing a headless CSV, if the number of configured properties differs from the total number of columns in the file, set to false to throw an error and halt the import process
  fitToHeader: true
  # Set to true to automatically create new graph, schemas and properties
  yes: true
  # The maximum threads
  threads: 32
  # The maximum size (in MB) of each packet
  maxPacketSize: 40
  # Define how double quotation marks are handled in CSV files; set to false (default) to treat them as field delimiters, or set to true to include them as part of the value
  quotes: true
  # Timezone for the timestamp values
  # timeZone: "+0200"
  # Timestamp value unit, support ms/s
  timestampUnit: s
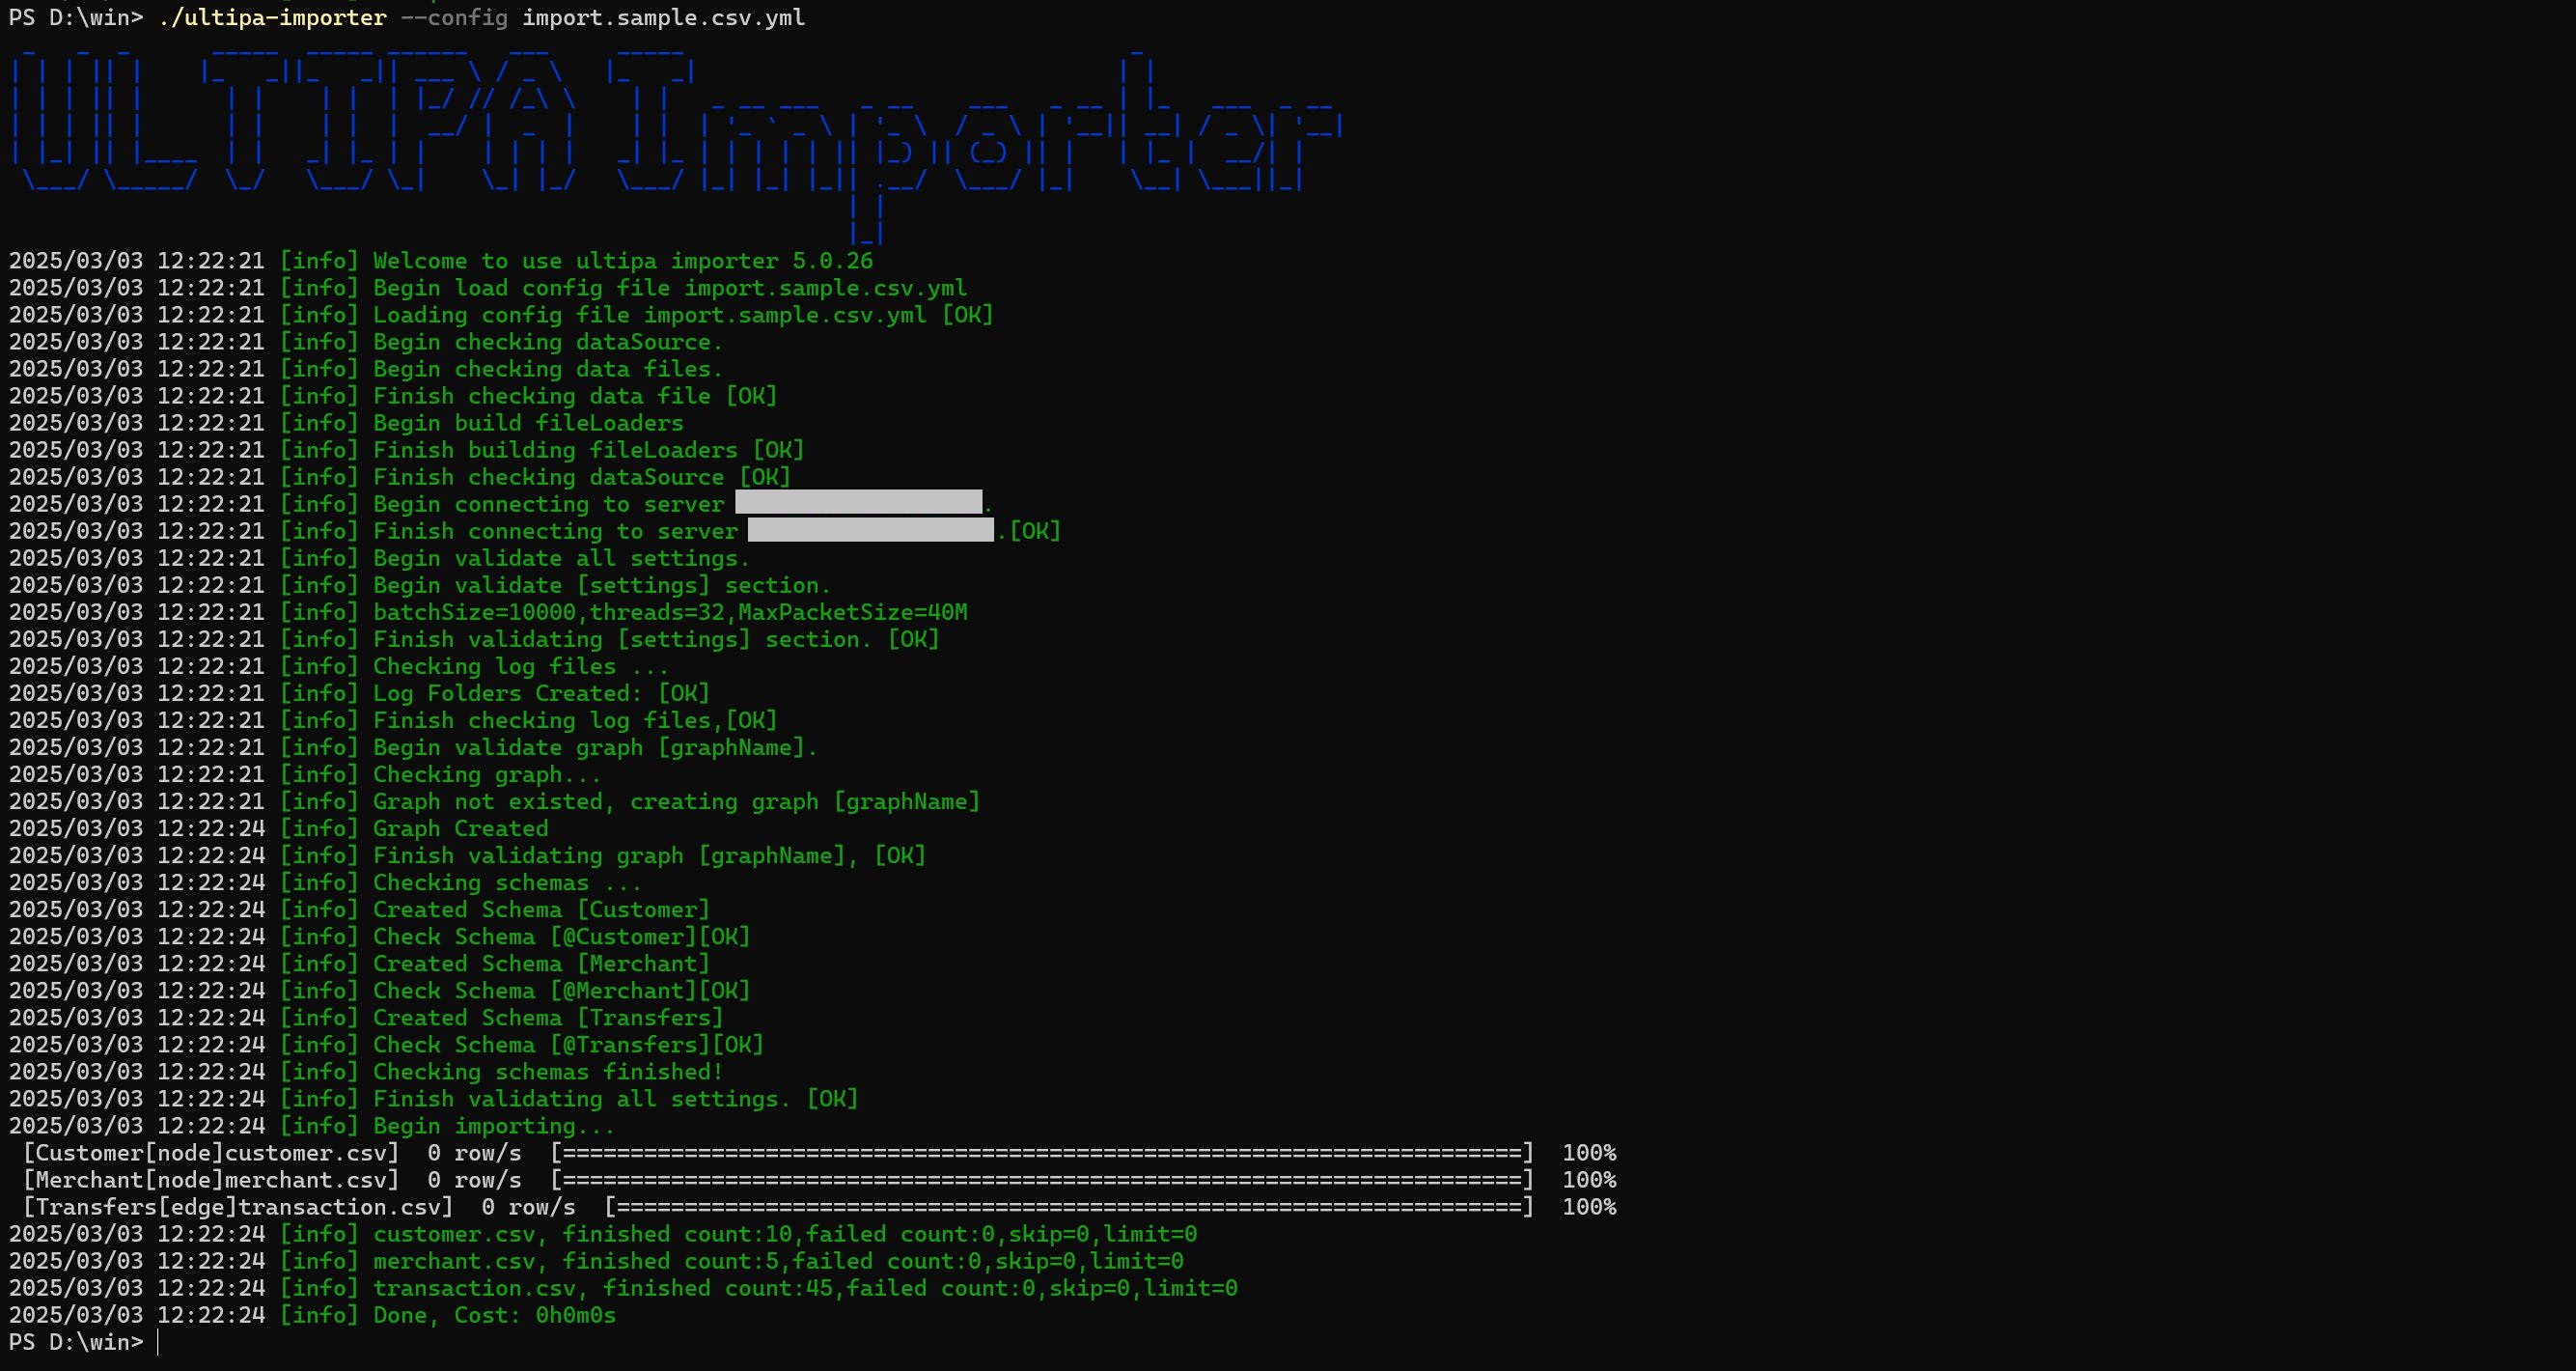
Execute Import
Execute the import by specifying the configuration file using the --config flag:
./ultipa-importer --config import.sample.csv.yml
How to set the CSV File Header
You may optionally include a header row at the begining of the CSV file. In the example file customer.csv, the header defines the names of three columns: cust_no, name, and level.
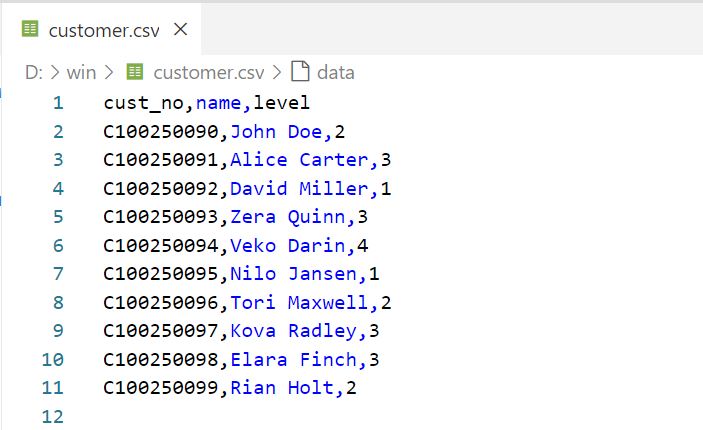
CSV file with a header - column name only
These column names can be referenced under nodeConfig/edgeConfig > properties > name in the configuration file.
You can also specify the value type for each column in the format <colName>:<valueType>, for example:
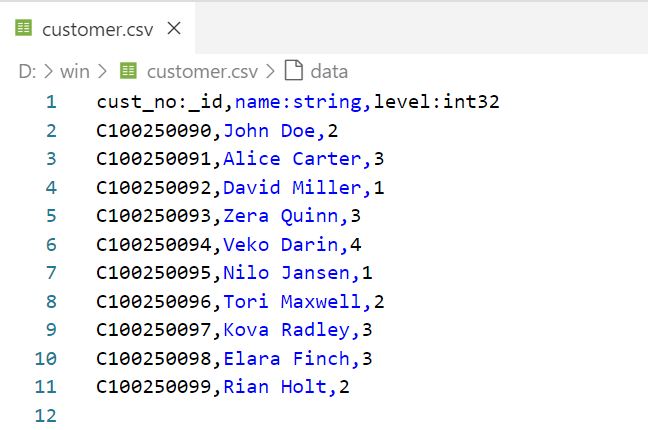
CSV file with a header - column name and value type
This allows you to omit defining the nodeConfig/edgeConfig > properties > type in the configuration file.
If the CSV file lacks a header, columns are mapped to the configured properties based on their order. If the number of configured properties does not match the total number of columns in the file, you must set settings > fitToHeader to true in the configuration file to aviod errors.
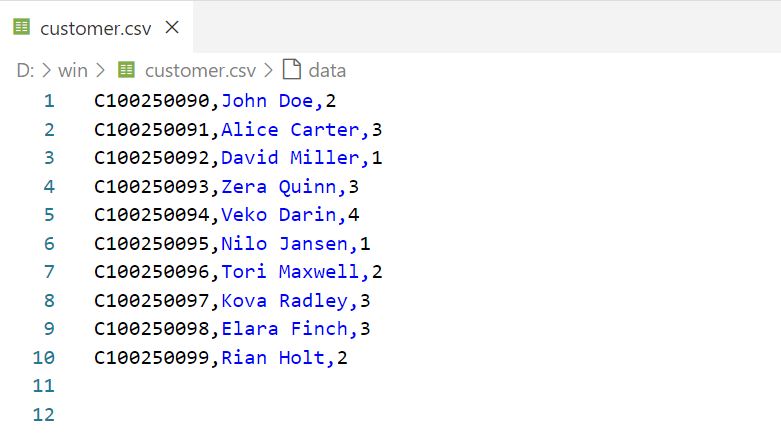
CSV file without a header
How to Import from a Folder
You can import from a folder containing several CSV files into Ultipa. Ensure that the CSV files meet the following criteria:
- Filename: Name the files for nodes and edges in the format
<xxx>.node.csvor<xxx>.edge.csv. - Header: All CSV files must include a header, where each column specifies the property name and its value type in the format
<propName>:<propType>.- Node data can include a column for the unique identifier
_id, with the header name as_id:_id. - Edge data must have two columns identifying the the source and destination nodes, with the header names as
_from:_fromand_to:_to, respectively.
- Node data can include a column for the unique identifier
Click to download the example folder:
You can unzip the file and place the folder in the same folder as ultipa-importer.
The configuration file for importing a folder does not allow detailed configuration of nodes and edges. Instead, you can only specify the same folder directory under the nodeConfig and edgeConfig sections.
...

# Node configurations
nodeConfig:
  # Specify the folder path on local machine or SFTP
  - dir: "./dataset"

# Edge configurations
edgeConfig:
  # Specify the folder path on local machine or SFTP
  - dir: "./dataset"

...